Discover the joy of Paint Your Own (PYO) cookies‚ a fun and creative activity perfect for all ages. Unleash your artistic side with edible paints and royal icing‚ creating personalized treats that are as delicious as they are unique.
What Are Paint Your Own (PYO) Cookies?
Paint Your Own (PYO) cookies are a delightful treat that combines creativity with deliciousness. These cookies are pre-baked and coated with a layer of royal icing‚ creating a smooth canvas for painting. Using edible paints made from food coloring and vanilla extract‚ anyone can customize their cookie with unique designs. PYO cookies are a fun activity for both kids and adults‚ offering a hands-on way to express artistic skills while enjoying a tasty reward at the end.
Why PYO Cookies Are a Great Activity for All Ages
Paint Your Own (PYO) cookies are an engaging and enjoyable activity for all ages‚ fostering creativity and fun. They allow individuals to express their artistic side while enjoying a delicious treat. Perfect for kids and adults alike‚ PYO cookies are simple to customize‚ making them a great way to spend quality time with family or host a memorable party. This budget-friendly activity sparks imagination and provides a sweet reward‚ making it ideal for creative expression and tasty enjoyment.
Materials Needed for PYO Cookies
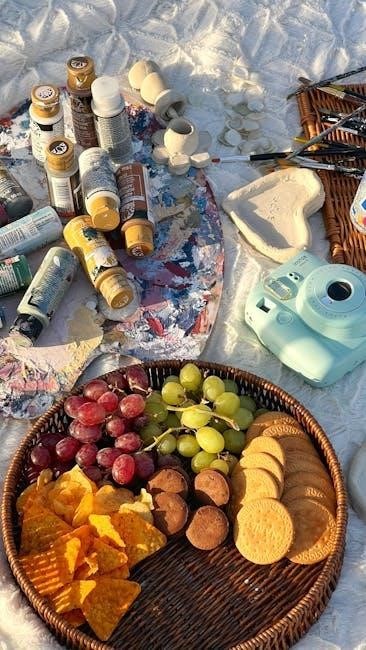
Gather essential supplies like cookie dough‚ cutters‚ and royal icing. Optional tools include airbrushes and food coloring for enhanced creativity and customization.
Essential Supplies: Cookie Dough‚ Cutters‚ and Icing
The foundation of PYO cookies starts with sugar cookie dough‚ which can be homemade or store-bought. Use cookie cutters to create shapes that serve as your canvas. Royal icing is crucial for flooding and detailing—ensure it’s the right consistency for smooth application. These basics set the stage for a fun and creative edible art experience for both kids and adults.
Optional Tools: Airbrush and Food Coloring
An airbrush adds detail but isn’t recommended for PYO cookies‚ as designs may smudge. Food coloring is a must for custom hues—mix with vanilla extract for a smooth paint consistency. These tools enhance creativity‚ allowing for vibrant‚ detailed designs. Perfect for both kids and adults‚ they make the painting process fun and engaging‚ ensuring your cookies are as unique as they are delicious.
Preparing Your Cookies for Painting
Bake and cool cookies completely. Apply a thin layer of royal icing for a smooth canvas. Let the icing dry fully before painting begins.
Baking and Cooling the Cookies
Bake your cookies according to your recipe until lightly golden. Allow them to cool on a wire rack for 10-15 minutes before transferring to a flat surface. Ensure cookies are completely cool to the touch‚ as warmth can cause icing to melt or paint to smear. This step is crucial for creating a stable surface for painting. Patience here ensures better results later!
Applying Royal Icing for a Smooth Canvas
Prepare royal icing to a 15-20 second consistency for outlining and flooding. Use a piping bag to outline the cookie edges‚ then fill with thinned icing. Spread evenly with a toothpick or knife. Allow the icing to dry completely‚ ideally overnight‚ for a smooth‚ sturdy canvas. Properly set icing ensures vibrant paint adhesion and prevents smudging. A well-prepared surface is key to achieving professional-looking results.
Allowing the Icing to Dry Properly
After applying royal icing‚ let it dry completely to ensure a smooth surface for painting. This typically takes 4-6 hours or overnight‚ depending on thickness. Keep cookies in a cool‚ dry place‚ away from direct sunlight. Humidity can slow drying‚ so use a fan if needed. Properly dried icing is essential for paint adhesion and prevents smudging. Once dry‚ the surface will be firm and ready for your creative touches with edible paints.
Creating Your Edible Paint Palette
Combine food coloring with a touch of vanilla extract to create vibrant‚ edible paints. Mix colors in small bowls and organize them on a decorative palette for easy access.
Using Food Coloring for Custom Colors
To create custom colors for your edible paint palette‚ mix a few drops of food coloring with vanilla extract. This mixture ensures vibrant hues and smooth consistency. Start with small amounts of coloring‚ adjusting as needed for desired intensity. Experiment with different combinations to achieve unique shades. Organize your colors in a palette or small bowls for easy access while painting. This method allows for endless creativity‚ making each cookie design truly personalized and fun.
Adding Vanilla Extract for Better Consistency
Mix a few drops of vanilla extract with food coloring to achieve a smooth‚ paint-like consistency. This ensures easy application and prevents the paint from becoming too watery or thick. Start with 2 teaspoons of vanilla extract per color‚ adjusting as needed for the perfect texture. The result is a vibrant‚ even finish that adheres well to the cookie surface‚ making your edible art both durable and visually appealing. This step is crucial for professional-looking results.
Setting Up Your Painting Station
Organize your paints‚ brushes‚ and cookies neatly. Use protective covers to prevent staining. Ensure good lighting for visibility. This setup makes painting efficient and enjoyable.
Organizing Your Paints and Brushes
Start by arranging your edible paints in a palette or small bowls. Label each color for easy identification. Store brushes in a container‚ grouping sizes for convenience. Keep wet wipes nearby for quick cleanups. Ensure all supplies are within reach to streamline the painting process. A well-organized station reduces clutter and allows for a smooth‚ enjoyable creative experience.
Protecting Your Workspace from Stains
Cover your work surface with parchment paper‚ a plastic tablecloth‚ or a silicone mat to prevent icing and paint stains. Place cookies on a tray or parchment-lined surface before painting. Use disposable smocks or aprons to protect clothing. Keep wet wipes nearby to quickly clean spills. This setup ensures your workspace remains tidy and stain-free‚ allowing you to focus on the creative fun of painting your cookies without worrying about messes.
Host a Fun Cookie Painting Party
Transform your gathering into a creative celebration with a Paint Your Own cookie party. Provide pre-baked cookies‚ edible paints‚ and brushes‚ and let guests unleash their artistic side. Include printable instruction cards for guidance and offer tips for hosting a stress-free‚ fun event that everyone will enjoy. It’s a perfect activity for birthdays‚ holidays‚ or any occasion‚ allowing guests to take home their personalized treats.
Tips for Organizing a PYO Party
- Plan ahead by pre-baking and icing cookies to save time during the party.
- Provide printable instruction cards for guests to follow along easily.
- Set up a well-organized painting station with supplies like brushes‚ edible paints‚ and smocks.
- Offer a variety of cookie shapes and sizes to inspire creativity.
- Include wet wipes or napkins to handle accidental spills or smudges.
- Encourage guests to take their creations home in small containers for a lasting party favor.
This setup ensures a fun‚ stress-free experience for everyone involved!
Engaging Kids and Adults in the Activity
Paint Your Own cookies are a delightful activity for all ages‚ fostering creativity and bonding. For kids‚ it’s a fun way to express their imagination‚ while adults can enjoy the nostalgic charm of decorating treats. Provide simple designs for beginners and more complex patterns for experienced artists. Encourage collaboration by pairing kids with adults to create joint masterpieces. This inclusive approach ensures everyone feels involved and excited‚ making the experience memorable and enjoyable for the whole family.

Step-by-Step Painting Instructions
Dip your brush in water‚ then pick up paint from the edible palette. 2. Gently apply the paint to the cookie‚ following your design. 3. Allow the paint to dry completely before serving or storing the cookies.
Preparing the Paint and Brushes
Start by mixing a few drops of food coloring with vanilla extract to create your edible paint. Use a small bowl for each color and stir well to achieve consistency. Next‚ lightly dip your paintbrush in water to moisten it‚ ensuring it’s not soaking wet. Gently dab the brush on the paint to pick up the color. This preparation ensures smooth‚ even application on your cookie canvas‚ making the painting process enjoyable and precise for all artists.
Applying the Paint to the Cookie
Gently dip your prepared brush into the edible paint‚ ensuring it’s lightly coated. Tap off any excess to avoid over-saturating the cookie. Begin painting with soft‚ steady strokes‚ starting from the center and working outward. For intricate details‚ use a fine-tip brush‚ while thicker brushes are ideal for broader areas. Layer colors if desired‚ allowing each layer to dry slightly before adding more. This technique ensures vibrant‚ long-lasting designs that bring your cookie canvas to life.
Allowing the Paint to Dry Before Eating
Once painted‚ let your cookies rest on a flat surface in a cool‚ dry environment. Avoid exposure to direct sunlight or moisture‚ as this can smear the design. Allow the paint to dry completely‚ which typically takes 20-30 minutes‚ depending on the thickness of the application. This ensures the paint sets properly and adheres to the cookie surface. Only after the paint is fully dry should you serve or store the cookies to preserve their vibrant‚ edible artwork.

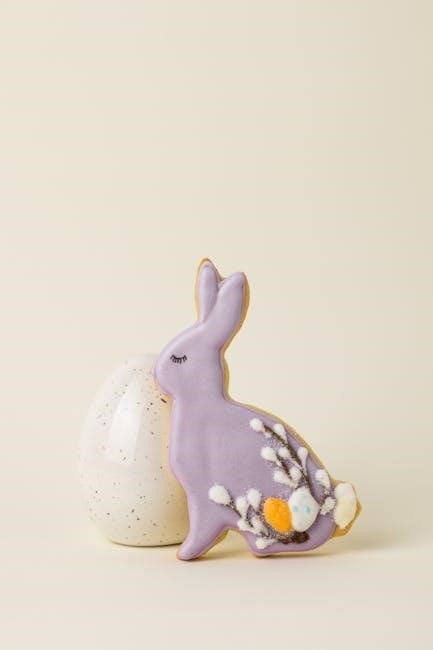
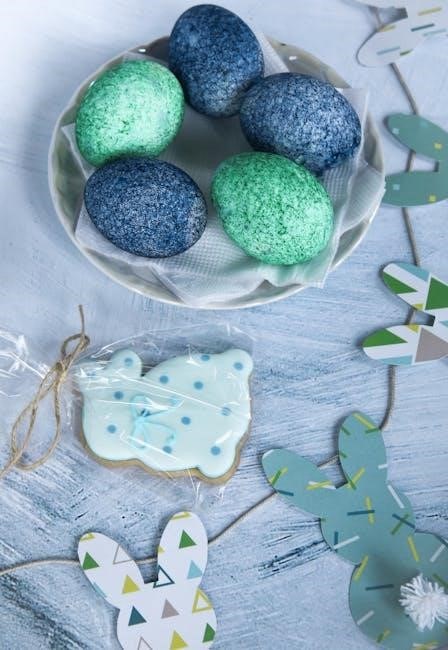
Design Ideas and Inspiration
Unleash your creativity with themed designs‚ from holiday patterns to birthday motifs. Use stencils for precision or freehand for a personal touch. Add details with layers or small strokes for a professional finish.
Simple Designs for Beginners
Start with basic shapes like dots‚ lines‚ and hearts. Use stencils for clean patterns or freehand simple themes like stripes or polka dots. For holidays‚ try themed designs such as Christmas trees or Easter eggs; Beginners can also outline the cookie edge with a thin brush for a decorative border. Layering small details‚ like eyes on a snowman‚ adds personality. Remember‚ simplicity is key—let the cookie’s shape inspire your design. Allow each layer to dry before adding more details for a polished look.
Advanced Techniques for Creative Cookie Art
Take your cookie painting to the next level with intricate designs and layering. Use fine-tip brushes for detailed work‚ such as shading or creating textures like fur or grass. Experiment with blending colors or ombre effects by mixing edible paints. For 3D effects‚ apply multiple thin layers‚ allowing each to dry before adding more. Try gradient backgrounds or geometric patterns for a modern look. Practice techniques like stippling or hatching to add depth and dimension. These methods allow for stunning‚ professional-looking cookie art that’s truly unique and impressive.
Tips for Success
Use high-quality brushes and ensure icing is fully dry before painting to prevent smudging. Add a touch of vanilla extract to thin paints for smoother application and vibrant colors.
Common Mistakes to Avoid
Avoid using too much water‚ as it can dilute the paint and cause peeling. Ensure icing is fully dry before painting to prevent smudging. Too many paint layers can crack. Use high-quality brushes for smooth strokes. Don’t airbrush over painted areas‚ as it may remove designs. Allow painted details to set before serving. These tips help achieve professional-looking results and prevent common issues during the cookie-painting process.
Storing Leftover Paint and Supplies
Store leftover edible paint in airtight containers to maintain consistency. Keep royal icing in sealed containers in the fridge for up to 3 days. Brushes should be cleaned and stored in protective cases to prevent damage. Label all containers for easy identification. Ensure paint palettes are sealed tightly to avoid drying out. Proper storage extends the life of your supplies and keeps them ready for future use. Always store in a cool‚ dry place away from direct sunlight.
Paint Your Own Cookies is a delightful activity that combines creativity with delicious treats. From preparing dough to painting masterpieces‚ it’s perfect for all ages. Whether hosting a party or a family project‚ this activity fosters joy and imagination. With proper storage‚ supplies stay fresh for future fun. Embrace this sweet and artistic tradition‚ making memories with every cookie. Happy painting and enjoy your edible art!