Welcome to the Lil Sew and Sew instruction manual, your guide to mastering the LSS-338 and LSS-505 models. This manual covers setup, basic operations, troubleshooting, and maintenance tips to ensure smooth sewing experiences. Whether you’re a beginner or an experienced user, this guide will help you maximize your machine’s potential with clear, step-by-step instructions and practical advice for optimal performance.
1.1 Overview of the Lil Sew and Sew Mini Sewing Machine
The Lil Sew and Sew mini sewing machine is a compact, portable device designed for small to medium sewing projects. It offers basic stitching options and is ideal for beginners or crafters needing a lightweight machine. Available in models like the LSS-338 and LSS-505, it features easy-to-use controls, a built-in needle threader, and adjustable stitch length. Its compact size makes it perfect for home use, while its affordability and simplicity appeal to hobbyists and DIY enthusiasts. Accessories like bobbins and presser feet are included for convenience.
1.2 Importance of Following the Instruction Manual
Adhering to the Lil Sew and Sew instruction manual is crucial for understanding machine operations, troubleshooting, and maintenance. It provides step-by-step guidance for setup, threading, and stitch selection, ensuring optimal performance. The manual also highlights safety precautions and tips for extending the machine’s lifespan. By following the instructions, users can avoid common errors, resolve issues like thread tension or bobbin winding problems, and make the most of their sewing experience. Regular reference to the manual ensures smooth and efficient sewing.
Understanding the Lil Sew and Sew Machine Models
The Lil Sew and Sew offers two popular models: the LSS-338 and LSS-505. The LSS-338 is a compact, portable mini sewing machine ideal for small projects, while the LSS-505 is a multi-purpose machine designed for versatility and ease of use, catering to both beginners and intermediate sewers with its advanced features and stitch options.
2.1 LSS-338 Model Features and Specifications
The LSS-338 model is a compact, portable mini sewing machine designed for small sewing projects. It features a simple, user-friendly interface with basic stitch options and adjustable speed. Weighing just a few pounds, it is ideal for beginners or those needing a machine for quick repairs. The LSS-338 includes a built-in bobbin case, a few presser feet, and a power cord. Its compact size and ease of use make it a great choice for sewing on the go or for small spaces, while its affordable price point appeals to hobbyists and casual sewers.
2.2 LSS-505 Model Features and Specifications
The LSS-505 model offers enhanced features compared to its predecessor, including multiple stitch types and a reverse stitching function. Designed for versatility, it accommodates various fabrics, from delicate cotton to thicker materials. The machine includes a built-in free-arm for hemming cuffs and pants, and it comes with several presser feet for different tasks. Its durable construction, easy thread guide, and adjustable tension controls make it suitable for both beginners and intermediate sewers looking to tackle a variety of sewing projects efficiently.
Setting Up Your Lil Sew and Sew Machine
Place the machine on a stable, flat surface with good lighting. Plug in the power cord and ensure all accessories are within easy reach for a smooth setup experience.
3.1 Unpacking and Inventory of Accessories
Start by carefully unpacking your Lil Sew and Sew machine and its accessories. Ensure all components, such as the power cord, bobbins, presser foot, and needles, are included. Check each item against the manual’s list to confirm completeness. Organize the accessories in a convenient location for easy access during setup and use. If any part is missing or unclear, refer to the manual for detailed descriptions and guidance.
3.2 Placing the Machine on a Stable Surface
Position your Lil Sew and Sew machine on a sturdy, flat surface, such as a desk or table, ensuring stability. Avoid uneven or shaky surfaces to maintain balance during operation. Place the machine in an area with good lighting to enhance visibility while sewing. Ensure there is enough space around the machine for comfortable fabric management and access to controls. Proper placement is essential for smooth and efficient sewing experiences.
3.3 Threading the Machine: Step-by-Step Guide
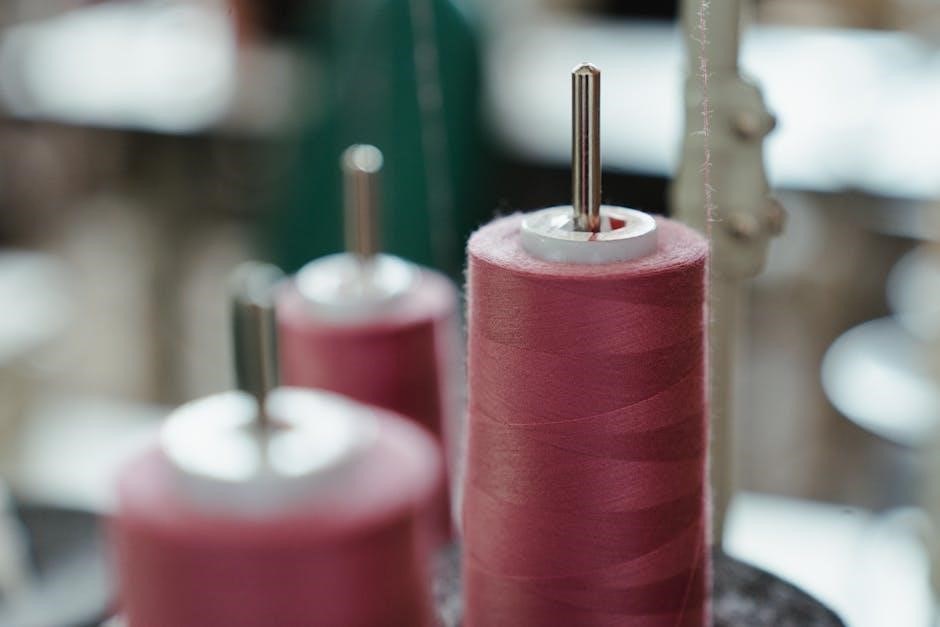
To thread your Lil Sew and Sew machine, start by turning the handwheel to raise the needle to its highest position. Insert the thread into the tension discs at the front, then guide it through the take-up lever and the needle. Gently pull the thread to ensure it is seated properly. Next, wind the bobbin and place it in the bobbin case, leaving a small length of thread exposed. Finally, pull the bobbin thread up through the machine’s stitch plate to complete the threading process.
Basic Sewing Operations
Learn to start the machine, adjust sewing speed, and manage thread tension. Master the correct use of the presser foot for smooth fabric control and consistent stitching.
4.1 Starting the Machine and Adjusting Speed
To begin, plug in the machine and ensure the power switch is in the “ON” position. Use the speed control switch to adjust stitching speed. For beginners, start with the slow speed setting to maintain control. Gently press the foot pedal to activate the motor. Always ensure the presser foot is down before sewing to prevent fabric slippage. Adjust the speed as needed for different fabrics or seam lengths. Practice on scrap fabric to get comfortable with the machine’s operation and speed settings.
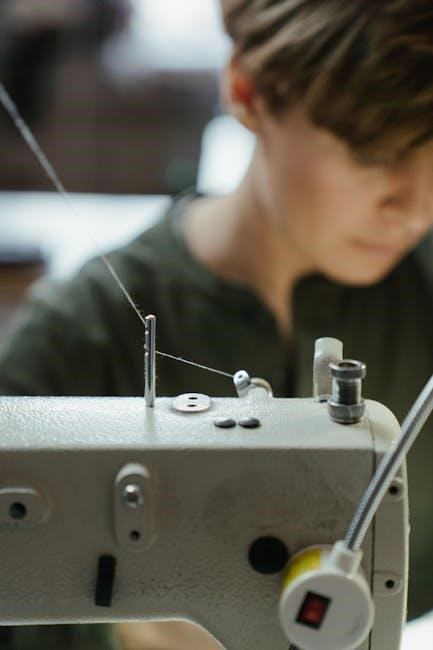
4.2 Threading the Needle and Managing Thread Tension
Thread the machine by pulling the thread from the spool through the tension discs and the take-up lever. Insert the thread into the needle from front to back. Gently pull the thread to ensure it is seated properly. Adjust the tension dial to achieve the correct balance, ensuring even stitches. If the thread is too tight or loose, fabric may pucker or stitches may be uneven. Refer to the manual for specific tension settings and guidance for your machine model.
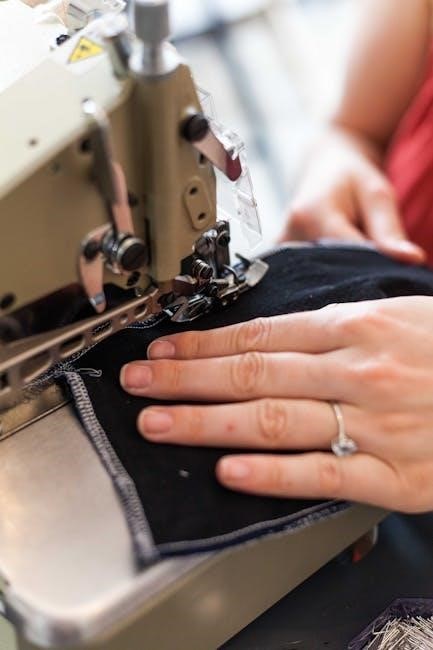
4.3 Using the Presser Foot Correctly
Always lower the presser foot before starting to sew to ensure proper fabric control. Select the correct presser foot for your fabric type, as specified in the manual. Guide the fabric smoothly under the foot, keeping it flat and aligned with the edge. Avoid pulling or pushing the fabric forcefully, as this can cause uneven stitches or machine misalignment. Use the foot to maintain consistent tension and prevent slippage. Raise the presser foot when repositioning the fabric or completing a seam.

Maintenance and Care Tips
Regularly clean and oil your Lil Sew and Sew machine to maintain optimal performance. Follow the manual’s guidelines for frequency and methods to ensure longevity.
5.1 Cleaning the Machine Regularly
Clean your Lil Sew and Sew machine frequently to remove dust, thread fragments, and lint. Use a soft brush to gently sweep away debris from the bobbin area and tension discs. Avoid harsh chemicals or liquids, as they may damage the machine. For thorough cleaning, refer to the manual for specific instructions and ensure all parts are dry before resuming use. Regular maintenance prevents jams and ensures smooth operation.
5.2 Oiling the Machine for Smooth Operation
Regularly oiling your Lil Sew and Sew machine ensures smooth operation and extends its lifespan. Use a few drops of high-quality sewing machine oil on moving parts, such as the needle bar and hook race. Turn the handwheel to distribute the oil evenly. For optimal results, oil the machine every 10-15 hours of use or as specified in the manual; After oiling, sew on scrap fabric to absorb excess oil before resuming your project.
Troubleshooting Common Issues
Address thread tension, bobbin winding, and jamming by checking the manual for specific guidance. Regular maintenance and correct threading can prevent many common issues. Always refer to your Lil Sew and Sew manual for model-specific solutions to ensure optimal performance and resolve problems efficiently.
6.1 Resolving Thread Tension Problems
Thread tension issues can cause uneven stitches or fabric pulling. To resolve this, rethread the machine with the presser foot up, ensuring the thread is properly seated in the tension discs. Check the bobbin for correct installation and ensure it’s wound evenly. If problems persist, refer to the manual for model-specific tension adjustment instructions. Regular maintenance and proper threading techniques will help prevent tension-related issues and ensure smooth sewing performance with your Lil Sew and Sew machine.
6.2 Fixing Bobbin Winding Issues
If your bobbin isn’t winding correctly, ensure it’s compatible with your Lil Sew and Sew machine. Place the bobbin on the winder, hold the thread end, and wind slowly. Avoid overfilling, as this can cause jams. If the bobbin isn’t seating properly, check for debris or misalignment. Consult the manual for specific model guidance, as the LSS-338 and LSS-505 may have slightly different procedures. Proper bobbin winding is essential for smooth stitching and consistent thread flow during sewing projects.
6.3 Addressing Thread Jamming
If thread jamming occurs, stop the machine immediately to avoid further damage. Gently pull the fabric to remove it without forcing. Check for tangled thread around the bobbin area and carefully remove any visible knots. Turn off the machine, unplug it, and inspect the needle area for debris. Clean out any lint or loose threads, then rethread the machine following the manual’s guidance. Ensure the presser foot is up and the thread path is clear before resuming sewing. Regular cleaning and proper threading can help prevent future jams.
Advanced Techniques for Lil Sew and Sew Users
Explore advanced sewing techniques with reverse stitching, multiple stitch types, and customizable settings. Enhance your projects with precision and creativity using these specialized features.
7.1 Using the Reverse Stitch Function
The reverse stitch function on your Lil Sew and Sew machine is essential for reinforcing seams. To use it, sew forward, then press and hold the reverse button. This feature is ideal for securing the start and end of your stitches, ensuring durability. Always refer to your manual for specific instructions on activating this function, as it may vary slightly between models like the LSS-338 and LSS-505. Proper use enhances your sewing projects’ quality and longevity.
7.2 Changing Stitch Types for Different Fabrics
Adapt your Lil Sew and Sew machine to various fabrics by selecting the appropriate stitch type. For lightweight materials, use a straight stitch, while stretchy fabrics benefit from a zigzag pattern. Heavy-duty fabrics may require a reinforced straight stitch. Always refer to your manual for model-specific guidance, as the LSS-338 and LSS-505 may have slight variations in stitch selection. Proper stitch selection ensures professional results and prevents damage to your machine or fabric.
Sewing Projects and Tips
Start with simple projects like pillowcases or tote bags and gradually move to more complex creations. Explore tips for fabric selection, thread matching, and seam finishing to enhance your sewing skills. Use online tutorials and your machine’s manual for inspiration and guidance. Practice regularly to improve precision and confidence in your stitches. Happy sewing!
8.1 Simple Sewing Projects for Beginners
Begin with simple projects like pillowcases or tote bags, which require straight lines and minimal fabric. These projects help you get comfortable with your machine’s basic functions. Start by practicing on scrap fabric to refine your stitching. Try making a coin purse or fabric coasters for quick, confidence-boosting results. Use the machine’s basic stitches and presser foot correctly for even seams. Online tutorials and your manual can guide you through these easy tasks. Enjoy the creative journey and happy sewing!
8.2 Intermediate Sewing Projects to Enhance Skills
Take your sewing to the next level with intermediate projects like zipper pouches, button-up shirts, or simple skirts. These projects introduce zippers, buttonholes, and working with various fabrics. Practice using different stitch types and the reverse function for reinforced seams. For stretchy fabrics, adjust tension settings for smooth results. Online tutorials and your manual offer detailed guidance. Start with scrap fabric to perfect techniques before cutting into final materials. These projects will refine your skills and expand your creative possibilities. Happy sewing!
The Lil Sew and Sew manual guides you in mastering sewing skills, completing projects, and maintaining your machine for optimal performance. Happy sewing!
9.1 Final Thoughts on Using the Lil Sew and Sew Machine
Using the Lil Sew and Sew machine is a rewarding experience, offering versatility and ease for both beginners and skilled sewists. Regular maintenance, proper threading, and understanding stitch functions are key to optimal performance. With practice, you’ll master various fabrics and techniques, creating countless projects. Refer to the manual for troubleshooting and tips to ensure longevity. Embrace creativity and enjoy the satisfaction of crafting with your Lil Sew and Sew machine!