Welcome to the GE Clothes Washer Repair Manual‚ your comprehensive guide to diagnosing and fixing issues with your General Electric washing machine․ This manual empowers you with DIY solutions‚ troubleshooting tips‚ and essential maintenance advice to keep your washer running smoothly․ Explore detailed instructions for addressing common problems‚ understanding error codes‚ and performing routine checks to ensure optimal performance and longevity․
Troubleshooting Common Issues
Identify symptoms like leaks‚ unusual noises‚ or failure to spin․ This section provides step-by-step guidance to diagnose and resolve common issues with your GE washer effectively․
Identifying Leaks and Water Damage
Leaks in your GE washer can stem from worn-out seals‚ loose hoses‚ or a faulty water inlet valve․ Start by inspecting the tub seal and gasket for signs of wear․ Check the drain pump filter for blockages‚ as this can cause water to leak during cycles․ Look for puddles around the washer and corrosion on hoses․ Addressing leaks promptly prevents water damage and mold growth․ Regularly inspecting hoses and connections can help you catch issues early․ Always ensure all parts are securely tightened after maintenance․
Fixing a Washer That Won’t Spin
If your GE washer isn’t spinning‚ start by checking the power supply and ensuring the lid switch is functional․ A faulty lid switch or loose connections can prevent spinning․ Next‚ inspect the drive belt for wear or breaks and ensure it’s properly aligned․ A broken or misaligned belt won’t transfer power to the drum․ Also‚ check the drain pump for blockages‚ as a clogged pump can disrupt the spin cycle․ Resetting the washer by unplugging it for 30 minutes may resolve electronic issues․ If none of these steps work‚ consider professional assistance to diagnose and repair complex problems like a malfunctioning motor or control board․
Addressing Noise and Vibration Problems
Noise and vibration issues in your GE washer can often be resolved by checking the load balance and ensuring the machine is properly leveled․ Uneven loads or an unbalanced washer can cause excessive movement during cycles․ Inspect the shock absorbers‚ springs‚ or suspension parts for wear or damage‚ as these components help dampen vibrations․ Additionally‚ a loose or damaged drum bearing may produce grinding noises․ Ensure all bolts and connections are secure‚ and verify the belt and pulley are in good condition․ Resetting the washer or checking for blockages in the drain pump can also help․
Understanding GE Washer Error Codes
GE washers use error codes to indicate issues․ Common codes include “Ld” for long drain and “PF” for power failure․ Understanding these aids troubleshooting․ Reset by unplugging‚ then pressing ‘Start/Stop’ and ‘Power’ buttons․ Consult the manual or online resources for specific meanings and detailed reset instructions․
Common Error Codes and Their Meanings
GE washers display error codes to identify issues․ “Ld” indicates a long drain problem‚ while “PF” signals a power failure․ Other codes like “Sud” or “F20” point to excess detergent or low water pressure․ These codes guide troubleshooting․ For example‚ “E1” or “E2” often relate to temperature or sensor malfunctions; Refer to your manual or online resources for specific code meanings and step-by-step solutions․ Resetting the washer by unplugging it and pressing ‘Start/Stop’ and ‘Power’ buttons may resolve some issues․ Always consult the manual for detailed repair guidance․
How to Reset Your GE Washer
To reset your GE washer‚ unplug it from the power outlet for 30 seconds․ Plug it back in and press the ‘Start/Stop’ and ‘Power’ buttons simultaneously for 5 seconds․ This reset process clears minor glitches․ For models without a dedicated reset button‚ this method works effectively․ If issues persist‚ consult your user manual for specific reset instructions or error code solutions․ Regularly resetting can help maintain your washer’s performance and address temporary malfunctions without professional intervention․
Essential Tools and Safety Precautions
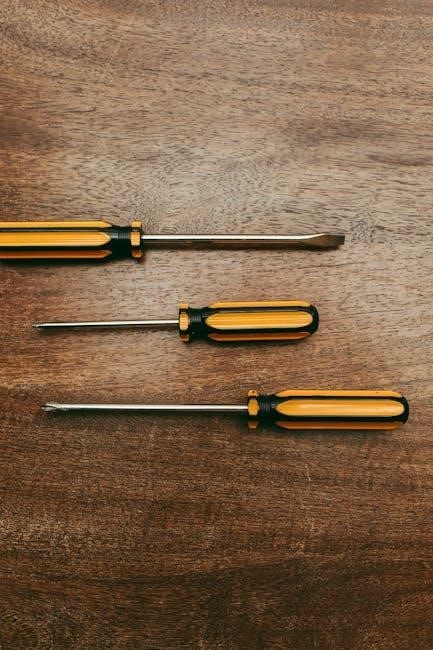
Essential tools include screwdrivers‚ pliers‚ and a wrench․ Always disconnect power before repairs․ Wear protective gloves and ensure the washer is empty to avoid accidents․
Must-Have Tools for Washer Repair
When repairing your GE clothes washer‚ essential tools include adjustable wrenches‚ screwdrivers (both Phillips and flathead)‚ pliers‚ and a multimeter for diagnosing electrical issues․ A torque wrench may be needed for specific bolts․ Safety gear like gloves and goggles is crucial․ Ensure you have replacement parts on hand‚ such as belts or valves‚ to minimize downtime․ Keep a bucket or drain pan nearby for water drainage․ Referencing the service manual will guide you on specialized tools required for specific repairs․
Safety Tips Before Starting Repairs
Always disconnect the washer from power and water supplies before starting repairs․ Wear protective gloves and goggles to prevent injury․ Ensure the machine is completely drained of water to avoid spills․ Never bypass safety features like lid locks or thermal sensors․ Keep loose clothing and jewelry away from moving parts․ Work in a well-ventilated area and avoid using electrical tools near water․ Refer to your manual for specific safety precautions․ If unsure about a procedure‚ consider consulting a professional technician․

Accessing GE Washer Service Manuals
Locate your washer’s model number‚ then visit GE’s official website or platforms like RepairClinic to download the specific service manual․ Ensure authenticity for accurate guidance․
How to Find Your Washer’s Model Number
Your GE washer’s model number is typically located on a sticker or plate inside the lid or on the back of the machine․ It’s usually a series of letters and numbers․ Open the washer lid and check the inner rim or the back panel for this information․ Once found‚ use this number to access the correct service manual or order specific parts online․ This ensures you get accurate instructions and compatible components for your particular model․
Downloading the Service Manual Online
To download the GE washer service manual‚ visit the official GE Appliances website․ Enter your washer’s model number in the search bar to find the corresponding manual․ Most manuals are available for free in PDF format‚ allowing you to easily download and print them․ Ensure your model number is correct for accurate results․ This resource provides detailed troubleshooting guides‚ repair instructions‚ and diagrams specific to your washer model‚ helping you address issues efficiently․
DIY Repair Steps for Common Parts
Follow step-by-step guides for replacing the drive belt‚ fixing the water inlet valve‚ and addressing other common parts․ Ensure to disconnect power before starting repairs․
Replacing the Drive Belt
Replacing the drive belt is a common repair for GE washers․ Symptoms of a faulty belt include loud noise during operation or the washer failing to spin․ To replace it‚ ensure the washer is unplugged for safety․ Locate the belt by accessing the back or bottom panel‚ depending on your model․ Remove the old belt‚ inspect the pulleys for wear‚ and install the new belt‚ ensuring it’s properly aligned and tensioned; Consult your specific model’s manual for precise instructions to avoid misalignment or further damage․
Fixing the Water Inlet Valve
Fixing the water inlet valve is essential if your GE washer isn’t filling properly or leaking․ Start by turning off the water supply and unplugging the washer․ Locate the valve‚ usually at the back‚ and disconnect the water hoses․ Remove the faulty valve by taking out the screws or clips holding it in place․ Install the new valve‚ ensuring all connections are secure․ Reattach the hoses and test the washer to confirm the issue is resolved․ Always refer to your specific model’s manual for detailed guidance․

When to Call a Professional
Call a professional if you encounter complex issues like persistent error codes‚ severe leaks‚ or major component failures․ Experts ensure safety and efficiency in repairs․
Signs You Need Expert Assistance
If your GE washer shows persistent error codes‚ has significant water leaks‚ or major components like the motor or gearbox fail‚ it’s time to call a professional․ DIY repairs may not address complex electrical or mechanical issues safely․ Unusual noises‚ vibrations‚ or if the washer stops mid-cycle repeatedly despite troubleshooting‚ indicate deeper problems․ Professionals have the tools and expertise to handle advanced repairs efficiently‚ ensuring your washer operates safely and effectively without further damage․
Locating Certified GE Repair Technicians
To find certified GE repair technicians‚ visit the official GE Appliances website and enter your model number for support resources․ Use the customer support line (1-800-432-2737) for assistance․ The website also offers FAQ links and repair articles to help locate professional services․ Ensure technicians are authorized by GE to guarantee quality and safety․ You can also access repair manuals and troubleshooting guides online for additional support․ This ensures your washer is repaired correctly and efficiently‚ maintaining its performance and warranty․
Preventive Maintenance Tips
Regular cleaning‚ checking load distribution‚ and leveling your washer can prevent common issues․ Inspect suspension parts and ensure proper installation for optimal performance and longevity of your GE washer․
Regular Cleaning and Checks
Regular cleaning and checks are essential for maintaining your GE washer’s performance․ Clean the gasket and tub regularly to prevent mold and mildew buildup․ Check the load balance to ensure even distribution and inspect hoses for kinks or leaks․ Ensure the washer is properly leveled to avoid vibration issues․ Additionally‚ leave the lid open after use to dry the interior and prevent odors․ Perform these checks every 1-2 months to maintain efficiency and extend the lifespan of your appliance․ Consistent maintenance helps prevent major repairs and keeps your washer running smoothly․
Ensuring Proper Washer Installation
Proper installation is crucial for your GE washer to function efficiently․ Begin by leveling the washer using adjustable feet to prevent vibration and imbalance․ Ensure the drain hose is securely connected and elevated to avoid siphoning․ Check that water supply hoses are tightly connected and free from kinks․ Verify electrical connections are secure and meet voltage requirements․ Finally‚ test the washer to ensure proper operation․ A well-installed washer reduces noise‚ vibration‚ and potential damage‚ ensuring optimal performance and longevity of the appliance․
This GE Clothes Washer Repair Manual provides a comprehensive guide to maintaining and repairing your washing machine․ By following the troubleshooting tips‚ understanding error codes‚ and performing regular maintenance‚ you can extend the life of your appliance․ Whether addressing minor issues or complex problems‚ this manual equips you with the knowledge to handle repairs confidently․ Remember to consult official GE resources and seek professional help when needed․ Proper care and timely fixes ensure your washer operates efficiently for years to come․