
Welcome to the Honeywell 5000 Install Manual, your comprehensive guide for installing and configuring the FocusPRO 5000 Series Non-Programmable Digital Thermostat; Designed for HVAC professionals and DIY enthusiasts, this manual ensures proper setup, compatibility, and optimal performance for your heating and cooling systems. Follow detailed instructions for wallplate installation, wiring, power options, and special features to achieve seamless control and energy efficiency.
Overview of Honeywell 5000 Thermostat
The Honeywell FocusPRO 5000 Series is a non-programmable digital thermostat designed for simplicity and efficiency. It is compatible with a wide range of heating and cooling systems, including conventional and heat pump configurations. The thermostat features a user-friendly interface, precise temperature control, and compatibility with various HVAC setups. Its compact design and straightforward installation make it a popular choice for both professionals and DIY enthusiasts. The FocusPRO 5000 Series is known for its reliability, energy efficiency, and ability to integrate seamlessly with existing systems, ensuring optimal performance and comfort in any home or commercial setting.
Importance of Proper Installation
Proper installation of the Honeywell 5000 thermostat is crucial for ensuring optimal performance, safety, and energy efficiency. Incorrect wiring or mounting can lead to system malfunctions, reduced efficiency, or even safety hazards. Following the installation manual carefully guarantees compatibility with your HVAC system and prevents potential damage. Proper setup also ensures accurate temperature control, minimizing energy consumption and extending the lifespan of the thermostat. Always refer to the official Honeywell 5000 install manual for precise guidance tailored to your specific system configuration and requirements.
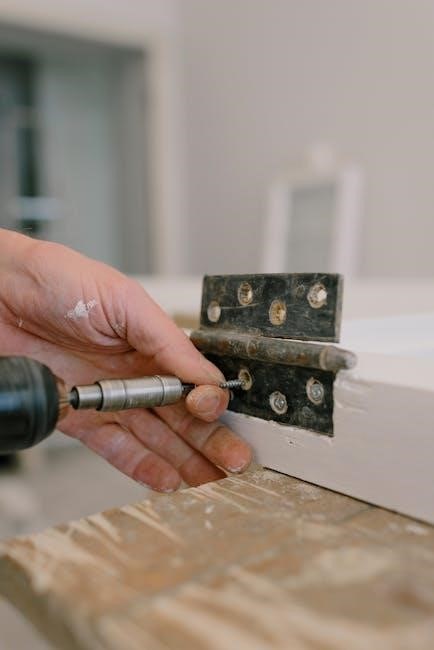
Wallplate Installation
Begin by removing the battery holder and gently pulling the wallplate away from the thermostat. Carefully guide the wires through the wallplate’s designated hole and position it securely on the wall, ensuring proper alignment and stability for the thermostat’s mounting.
Steps for Removing and Mounting the Wallplate
Start by removing the battery holder to access the wallplate. Gently pull the wallplate away from the thermostat, ensuring wires remain intact. Feed the wires through the wallplate’s wire hole to prevent damage. Position the wallplate on the wall, aligning it with the mounting screws or existing holes. Secure the wallplate firmly using the provided screws. Double-check the alignment to ensure proper fit and functionality. Once mounted, reinstall the battery holder and proceed with thermostat installation. Follow these steps carefully to avoid damaging the device or wires.
Key Considerations for Wallplate Installation
Ensure the wallplate is properly aligned and leveled during installation to maintain thermostat accuracy. Avoid bending or pinching wires when removing or mounting the wallplate. Verify that all wires are securely connected and routed through the wire hole to prevent damage. Check for existing holes or marks on the wall to simplify installation. Use the provided screws to secure the wallplate firmly, ensuring stability. Always follow safety precautions and manufacturer guidelines to avoid electrical hazards. Proper wallplate installation is crucial for the thermostat’s functionality and overall system performance.

Power Options and Requirements
The Honeywell 5000 supports flexible power options, including battery and AC power configurations, ensuring reliable operation and compatibility with various HVAC systems. Always meet specified voltage and compatibility requirements for optimal performance and energy efficiency.
Battery Installation and Power Sources
For Honeywell 5000 thermostat models requiring batteries, install two fresh AA alkaline batteries to ensure reliable power. Remove the wallplate and locate the battery holder. Insert the batteries while observing the polarity indicators to avoid incorrect installation. Secure the holder back in place and reattach the wallplate. Batteries typically last up to five years under normal usage. If using AC power, connect the system according to the wiring diagram to bypass battery dependency. Always verify power sources match system requirements for optimal performance and energy efficiency.
AC Power Setup and Compatibility
The Honeywell 5000 thermostat can be powered using AC power for continuous operation. Follow the manufacturer’s guidelines to ensure safe and proper setup. The system is compatible with 24VAC, 50/60Hz power sources, typically supplied by the HVAC system’s transformer. Ensure compatibility with conventional heating, cooling, or heat pump systems. Avoid connecting directly to 120V or 240V sources, as this could damage the thermostat. Use the wiring diagram provided in the manual for correct connections to prevent malfunctions. Always refer to Honeywell’s installation instructions for a safe and effective setup.

Wiring Instructions
Proper wiring setup for the Honeywell 5000 involves connecting R, W, Y, G, C, and other terminals as required. Ensure correct connections for safe and efficient operation. Always follow manufacturer’s guidelines and turn off power before starting work.
Wiring Conventional Heating and Cooling Systems
For conventional heating and cooling systems, connect the R (24V) and C (common) wires to the thermostat. The W wire connects to the heating stage, while Y is for cooling. G controls the fan. Ensure all connections match the system type (1-stage or 2-stage). Verify wiring compatibility with your HVAC system. Turn off power before starting work. Follow the manual’s wiring diagram for accurate setup. Double-check connections to avoid malfunctions. Proper wiring ensures safe and efficient system operation. Refer to the manual for specific configurations and safety guidelines.
Wiring Heat Pump Systems
For heat pump systems, connect the R (24V) and C (common) wires to the thermostat. The Y wire controls cooling, while W handles heating. The O/B wire is used for heat pump reversal. G controls the fan. Connect the E (emergency heat) wire if your system includes emergency heat. Ensure compatibility with 2-stage or multi-stage systems. Verify wiring with the system’s configuration. Turn off power before wiring. Refer to the manual for specific heat pump wiring diagrams. Proper connections ensure efficient heating and cooling operation; Double-check all wires to avoid system malfunctions and ensure safe operation.

Thermostat Mounting and Alignment
Ensure the thermostat is level and plumb for accurate temperature readings. Secure the device firmly to the wall, avoiding uneven surfaces. Proper alignment guarantees optimal functionality and display accuracy.
Preparing the Wall for Thermostat Mounting
Begin by ensuring the wall surface is clean, dry, and level. Remove any old adhesive or debris to guarantee a secure installation. If mounting on a hollow wall, use appropriate anchors to prevent the device from shifting. Verify the wall can support the thermostat’s weight, especially if additional components like sensors are included. Avoid areas with direct sunlight or extreme temperatures for accurate temperature readings. Gently pull wires through the wire hole to prevent damage. Ensure the area around the mounting location is clear of obstructions or electrical components for safe and proper installation.
Aligning and Securing the Thermostat
Once the wall is prepared, align the thermostat with the wallplate, ensuring it is level and plumb. Use a spirit level to confirm proper alignment. Gently pull the wires through the wire hole and connect them to the appropriate terminals as per the wiring diagram. Secure the thermostat to the wallplate using the provided screws, tightening firmly but avoiding overtightening. Double-check the alignment after securing to ensure accurate temperature readings and proper functionality. Make sure the thermostat is flush against the wall for a clean, professional finish.

Special Functions and Features
The Honeywell 5000 offers advanced features like emergency heat mode and system test modes to ensure optimal performance. It also includes installer setup options for customized configurations, providing enhanced control and compatibility with various HVAC systems.
Emergency Heat and System Test Modes
The Honeywell 5000 thermostat features emergency heat mode for auxiliary heating when the primary system fails. The system test mode allows verification of heating, cooling, and fan operation, ensuring all components function correctly. For systems without an emergency heat relay, install a field jumper between Aux and E terminals to activate emergency heat. These modes are essential for troubleshooting and confirming proper system setup, providing peace of mind and reliable performance.
Installer Setup and Configuration Options
The Honeywell 5000 thermostat offers installer setup and configuration options to tailor the system to specific HVAC configurations. Installers can choose between manual or auto changeover modes for heat and cool functions, optimizing energy use and comfort. The setup process involves configuring the thermostat to match the installed heating and cooling system, ensuring all features operate correctly. Customization options allow installers to fine-tune settings, such as temperature ranges and fan operations. These configurations ensure the thermostat functions efficiently, aligning with the homeowner’s preferences and the system’s capabilities for optimal performance and energy savings.

System Specifications
The Honeywell 5000 Series thermostats, including models TH5110D, TH5220D, and TH5320U, are designed for compatibility with 1-2 heat and 1-2 cool systems. They support conventional HVAC systems, heat pumps, and dual-fuel configurations, ensuring versatility for various home setups. The thermostats are non-programmable, offering straightforward operation with precise temperature control, making them ideal for reliable and efficient heating and cooling management.
Technical Specifications of Honeywell 5000
The Honeywell 5000 Series includes models like TH5110D, TH5220D, and TH5320U, designed for 1-2 heat and 1-2 cool systems. These thermostats are non-programmable, offering compatibility with conventional HVAC systems, heat pumps, and dual-fuel setups. They require a 24V power source and support up to 3-stage heating and 2-stage cooling. The thermostats feature precise temperature control, with a range of 35°F to 90°F (2°F increments). They are designed for wall mounting and include a large, easy-to-read display for user-friendly operation. The Honeywell 5000 Series ensures reliable performance and energy efficiency in various home environments.
Compatibility with Heating and Cooling Systems
The Honeywell 5000 Series thermostats are designed to work seamlessly with a wide range of heating and cooling systems. They are compatible with conventional gas, oil, and electric furnaces, as well as heat pumps and dual-fuel systems. The thermostats support up to 3-stage heating and 2-stage cooling, ensuring optimal performance across various configurations. Additionally, they can integrate with zoning systems for precise temperature control in different areas of the home. This versatility makes the Honeywell 5000 Series a reliable choice for diverse HVAC setups, providing efficient and consistent climate control.
Customer Assistance and Support
For any questions or concerns, contact Honeywell Customer Relations at 1985 Douglas Dr, Golden Valley, MN 55422 or call 1-800-468-1502 for assistance and support.
Contact Information for Honeywell Customer Service
For assistance with your Honeywell FocusPRO 5000 Series thermostat, contact Honeywell Customer Relations at 1985 Douglas Drive, Golden Valley, MN 55422. You can also call their toll-free number at 1-800-468-1502. In Canada, reach out to Honeywell Limited at 35 Dynamic Drive, Toronto, Ontario M1V4Z9. Visit their official website for additional support resources, including user manuals and troubleshooting guides. Refer to the provided PDF manual for detailed installation and configuration instructions.
Troubleshooting Common Installation Issues
Troubleshooting Common Installation Issues
Common issues during Honeywell 5000 installation include wiring errors, power connectivity problems, and system incompatibilities. Wiring issues: Ensure all connections are secure and match the system type (conventional or heat pump). Power problems: Verify battery installation or AC power setup. System test: Run heating, cooling, and fan tests to confirm functionality. For persistent issues, refer to the manual or contact Honeywell Customer Service for assistance. Proper troubleshooting ensures optimal performance and avoids system damage.