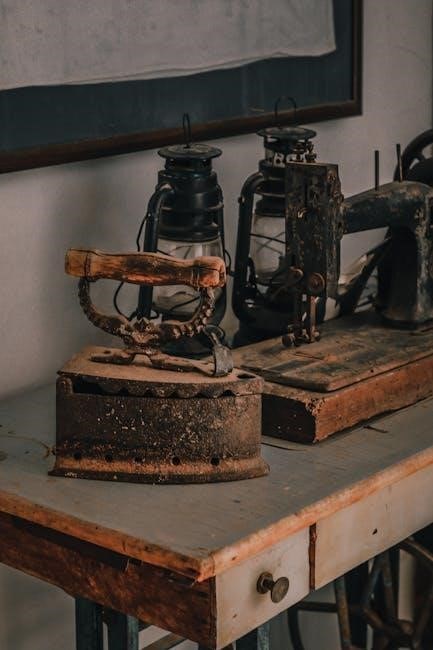
Old Singer sewing machines‚ trusted since 1851‚ offer timeless durability. Vintage models like 15-90‚ 201k‚ and 66k remain popular. Original manuals are essential for maintenance and operation.
1.1 Historical Background of Singer Sewing Machines
Singer sewing machines have a rich history dating back to 1851 when Isaac Merritt Singer patented the first practical sewing machine. Since then‚ Singer became a global leader‚ revolutionizing sewing for both home and industry. Vintage models like the 15-90‚ 201k‚ and 66k are highly sought after by collectors and sewists for their durability and timeless design. These machines represent a legacy of innovation and craftsmanship‚ making them treasured possessions for generations of seamstresses worldwide.
1.2 Importance of Using a Manual for Vintage Models
Using a manual for vintage Singer sewing machines is crucial for understanding their unique features and proper operation. These guides provide step-by-step instructions for threading‚ maintenance‚ and troubleshooting. Manuals also detail how to use attachments and optimize stitching. For models like the 15-90 and 201k‚ original manuals are indispensable‚ ensuring users can unlock their full potential while preserving their functionality and longevity. They serve as a bridge to the past‚ helping modern users appreciate the craftsmanship of these timeless machines.
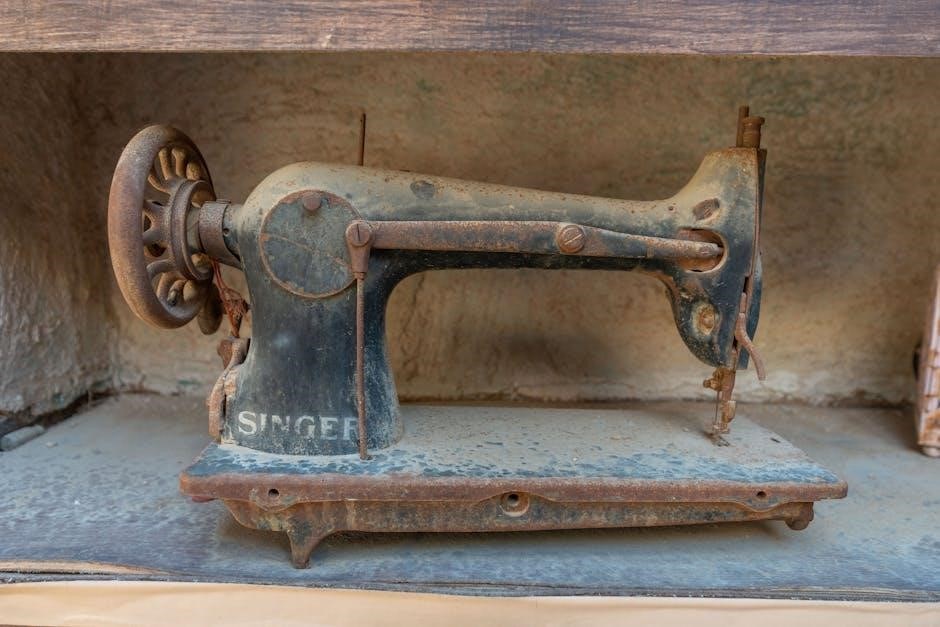
Identifying Your Singer Sewing Machine Model
Identifying your Singer sewing machine model is essential for maintenance. Model numbers are typically found on the base or near the bobbin area. Vintage models like the 15-90‚ 201k‚ and 66k are popular. Original manuals provide guidance for accurate identification and operation.
2.1 How to Locate the Model Number
To identify your Singer sewing machine model‚ locate the model number on the base plate or near the bobbin area. Common models like 15-90‚ 201k‚ and 66k have numbers engraved or printed. Check the machine’s base‚ often under a metal plate‚ or near the stitch selector. For electric models‚ the number may be on the motor housing. Refer to your Singer manual or the Singer website for cross-referencing. Accurate identification ensures proper maintenance and repair. Model numbers are essential for finding compatible parts and accessories‚ ensuring optimal performance and longevity of your vintage machine.
2.2 Common Vintage Singer Models (e.g.‚ 15-90‚ 201k‚ 66k)
Popular vintage Singer models include the 15-90‚ 201k‚ and 66k‚ known for their durability and versatility. The 15-90 is a heavy-duty model‚ while the 201k is favored for its portability and straight-stitch capability. The 66k is another versatile option‚ suitable for various fabrics. These models are highly sought after by collectors and sewists alike. Singer offers free PDF manuals for these models‚ making maintenance and operation straightforward. Their timeless design ensures they remain functional and cherished for generations. These machines are a testament to Singer’s enduring craftsmanship and reliability.
Setting Up Your Vintage Singer Sewing Machine
Setting up your vintage Singer involves carefully unpacking‚ assembling‚ and placing it on a sturdy sewing table. Ensure all parts are present and undamaged.
3.1 Unpacking and Preparing the Machine
Unpacking your vintage Singer sewing machine requires care to avoid damage. Inspect the machine and accessories for any signs of wear or damage. Gently remove packaging materials‚ ensuring all parts are included. Clean the machine with a soft cloth to remove dust or debris. Lubricate moving parts using Singer sewing machine oil to prevent rust and ensure smooth operation. Refer to the manual for specific instructions tailored to your model‚ as preparation steps may vary slightly for different machines.
3.2 Assembly and Placement on a Sewing Table
Place your vintage Singer sewing machine on a sturdy‚ flat surface‚ ensuring stability. Align the machine with the motor‚ if separate‚ and secure it according to the manual. Use the provided screws or attachments to fasten the machine to the table. Ensure the work area is clear and well-lit. Position the machine at a comfortable height to accommodate your sewing needs. Proper alignment and leveling are crucial for smooth operation. Refer to your specific model’s manual for detailed assembly instructions.
Threading the Machine
Follow the manual’s step-by-step guide to thread your Singer sewing machine. Use the correct thread type for vintage models‚ ensuring smooth stitching and proper tension control.
4.1 Step-by-Step Guide to Threading
Start by locating the spool pin and thread guide. Insert the thread through the machine’s tension discs‚ ensuring it flows smoothly. Loop the thread around the take-up lever and pull gently to set tension. Guide the thread through the needle bar and insert into the needle’s eye. Avoid twisting or forcing the thread. Use Singer-recommended thread types for optimal performance. Refer to your manual for model-specific threading diagrams and instructions to ensure proper setup and functionality.
4.2 Using the Correct Thread Type for Vintage Machines
Use high-quality‚ medium-weight cotton or polyester thread for vintage Singer machines. Avoid thick or metallic threads‚ as they may jam the mechanism. For delicate fabrics‚ silk or wool threads are suitable. Always choose threads compatible with your fabric type to ensure smooth stitching. Refer to your manual for specific recommendations‚ as some models may require heavier-duty threads. Proper thread selection maintains machine performance and extends its lifespan‚ ensuring optimal sewing results for various projects and materials.
Sewing Machine Maintenance
Regular maintenance is crucial for extending the life of your vintage Singer sewing machine. Clean and oil it frequently‚ following manual guidelines for optimal performance and longevity.
5.1 Cleaning the Machine: Best Practices
Cleaning your vintage Singer sewing machine is essential for smooth operation. Turn off and unplug the machine before starting. Use a soft‚ dry cloth to wipe away dust and debris from the exterior. For internal cleaning‚ gently brush lint and thread remnants from the bobbin area and tension discs. Avoid using harsh chemicals or abrasive materials‚ as they can damage the finish. For thorough cleaning‚ use compressed air to remove dust from tight spaces. Always refer to your Singer manual for specific cleaning instructions tailored to your model. Regular cleaning prevents jamming and ensures optimal performance. Oiling should follow cleaning to maintain mechanical parts. Remember‚ Singer recommends using their branded sewing machine oil for best results. Avoid using household oils‚ as they may leave residue. For detailed guidance‚ consult Singer’s official maintenance guidelines or download free PDF manuals online‚ which often include step-by-step cleaning procedures. Proper care will extend the life of your machine and keep it sewing like new.
5.2 Oiling the Machine: Recommended Oils and Techniques
Regular oiling is vital for maintaining your vintage Singer sewing machine. Use Singer Brand Sewing Machine Oil‚ as other oils may leave residue or damage parts. Apply a few drops to moving components‚ such as the bobbin area‚ tension discs‚ and gears. Gently rotate the handwheel to distribute the oil evenly. Avoid over-oiling‚ as excess can attract dust and cause mechanical issues. For detailed instructions‚ refer to your Singer manual or download a free PDF guide online. Proper oiling ensures smooth operation and prevents wear.
5.3 Replacing Parts: Where to Find Vintage Parts
Vintage Singer sewing machine parts can be sourced from online marketplaces‚ sewing communities‚ and specialized suppliers. Singer’s official website offers manuals and parts databases for various models. Enthusiast forums often provide leads on rare components. For models like the 15-90 or 66k‚ online retailers like eBay and Etsy are reliable options. Additionally‚ Singer’s global network ensures parts are available with international shipping‚ making it easier to restore your machine to optimal condition while maintaining its authenticity and functionality.
Troubleshooting Common Issues
Address jams by clearing thread and debris. Adjust tension for uneven stitching. Use Singer Brand Oil to prevent mechanical friction. Refer to model-specific manuals for guidance.
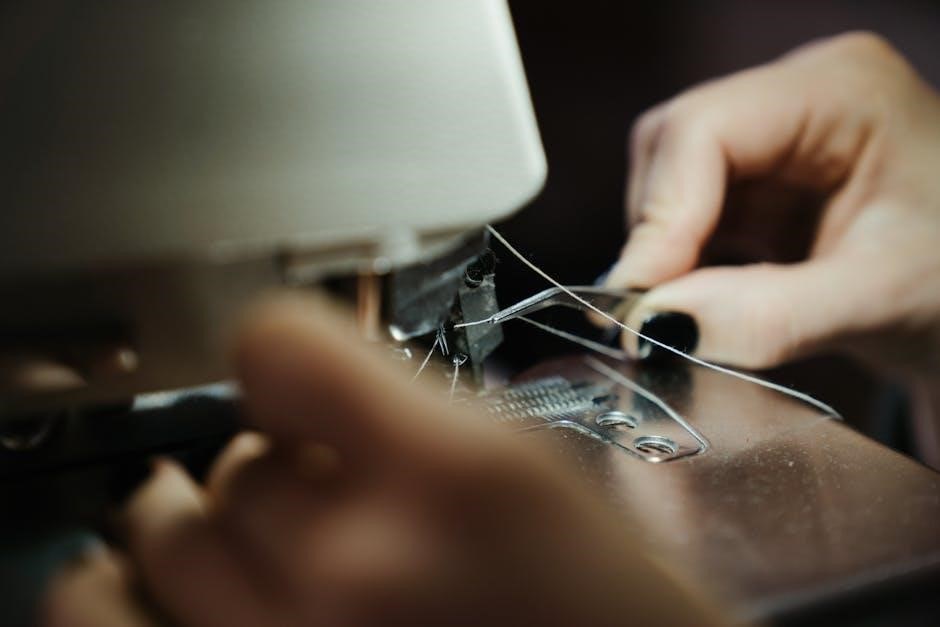
6.1 Fixing a Jammed Machine
To fix a jammed machine‚ turn it off and unplug it; Gently remove the fabric and any tangled thread. Check the bobbin area for debris. Reattach the bobbin correctly‚ ensuring it’s seated properly. Retrace your threading steps‚ consulting the manual if needed. Apply Singer Brand Oil to moving parts to prevent friction. Avoid using all-purpose oils‚ as they may damage the machine. Regular maintenance and proper threading can help prevent future jams.
6.2 Adjusting Tension for Proper Stitching
Proper tension ensures even stitching; Turn off the machine and gently pull the upper thread to check resistance. If too tight‚ loosen the tension knob slightly. For models like 15-90 and 201k‚ refer to the manual for specific guidance. After adjustments‚ test on scrap fabric. If stitches remain uneven‚ rethread the machine and verify bobbin tension. Singer Brand Oil can help maintain smooth operation. Always follow manual instructions for precise adjustments to avoid further issues.
6.3 Solving Electrical Problems
Check the power cord for damage and ensure it’s securely plugged in. If the machine doesn’t start‚ inspect the electrical connections. For models like 15-90 and 201k‚ consult the manual for motor specifics. Blown fuses or tripped circuit breakers may also cause issues. Avoid DIY repairs if unsure‚ as this could damage the machine. For vintage models‚ consider rewiring or replacing outdated electrical components. Always use Singer-approved parts and follow manual guidelines for safe troubleshooting and maintenance.
Sewing Techniques for Vintage Machines
Master basic stitches like straight and backstitch. Use appropriate thread types and presser feet for different fabrics. Adjust tension for consistent stitching quality and fabric handling.
7.1 Basic Stitches: Straight Stitch and Backstitch
The straight stitch is the most common stitch‚ ideal for general sewing. Use it for seaming fabrics and repairing clothes. The backstitch is perfect for reinforcing seams‚ especially at stress points like zippers or buttonholes. Vintage Singer machines‚ such as the 15-90 and 201k‚ excel at these stitches. Always use the correct presser foot and adjust tension for consistent results. Proper threading and fabric placement ensure professional-looking stitches. Practice these basics to build a strong foundation for more complex techniques.
7.2 Sewing Fabrics: Tips for Different Materials
For cotton and linen‚ use a sharp needle and medium tension. Silk and delicate fabrics require a fine needle and reduced tension to prevent damage. Denim and heavy materials need a heavy-duty needle and higher tension. Always prewash fabrics to remove sizing and ensure accurate measurements. Use the appropriate presser foot for the fabric type‚ such as the zigzag foot for knits. Vintage Singer machines like the 15-90 and 201k handle various fabrics well with proper setup. Adjust stitching length for thicker or thinner materials.

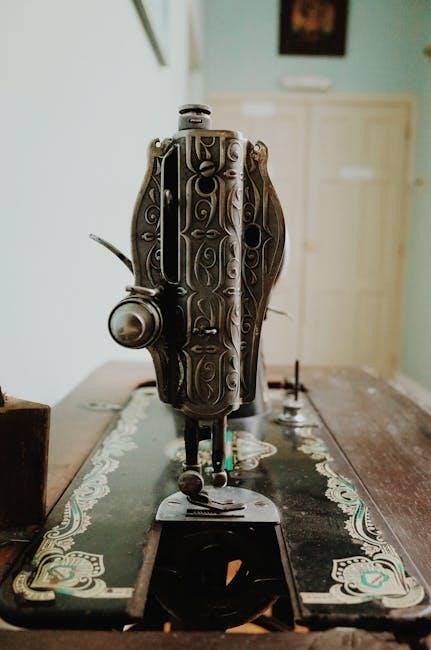
Accessories and Attachments
Enhance sewing with Singer’s diverse presser feet‚ perfect for quilting‚ embroidery‚ and zippers. Vintage attachments like rufflers and tuckers add versatility. Explore online databases for compatible Singer parts.
8.1 Understanding Different Presser Feet
Presser feet are essential for optimizing your Singer sewing machine’s performance. They come in various types‚ such as zigzag‚ zipper‚ and blind hem feet‚ each designed for specific tasks. The zigzag foot is ideal for general sewing‚ while the zipper foot ensures precise stitching near zippers. For delicate fabrics‚ a Teflon or roller foot is recommended. Vintage Singer machines often use interchangeable feet‚ enhancing versatility. Always refer to your manual to identify compatible feet for your model and ensure proper installation for optimal results.
8.2 Using Vintage Attachments for Embroidery and Quilting
Vintage Singer attachments like the quilting bar and embroidery hoop expand creative possibilities. These tools allow precise stitching for intricate patterns and large-scale projects. The quilting bar helps maintain even fabric tension‚ while the embroidery hoop stabilizes fabric for detailed work. Many vintage models‚ such as the 15-90 and 201k‚ support these attachments. Explore online communities for rare parts and guides to enhance your embroidery and quilting projects with these timeless accessories.

Safety Precautions
Always unplug the machine when not in use. Keep fingers away from moving parts and avoid loose clothing near needles. Ensure proper ventilation while sewing.
9.1 General Safety Guidelines
Always follow safety guidelines when using vintage Singer sewing machines. Keep loose clothing and long hair tied back. Avoid operating the machine near children or pets. Use the correct Singer Brand Oil to prevent damage. Regularly clean and maintain the machine to ensure smooth operation. Never touch sharp parts like needles or presser feet. Keep the sewing area well-lit and free from clutter. Unplug the machine during maintenance or when not in use. Handle electrical components with care to avoid shocks or malfunctions.
9.2 Handling Sharp Objects and Electrical Components
Handle needles‚ presser feet‚ and other sharp parts with care to avoid injury. Use needle holders or tweezers when replacing or adjusting needles. When working with electrical components‚ ensure the machine is unplugged to prevent shocks. Avoid touching internal wiring or motors. Keep all sharp objects out of children’s reach. Regularly inspect needles for damage and replace them if necessary. Always follow the manual’s guidance for safe handling of electrical and sharp parts to maintain safety and machine functionality. This ensures both user safety and machine longevity.
Storing the Machine
Store your vintage Singer sewing machine in a dry‚ cool place‚ protected from dust. Use a sturdy cover and avoid extreme temperatures to preserve its condition and functionality.
10.1 Proper Storage Techniques
Properly store your vintage Singer sewing machine by first cleaning it thoroughly to prevent dust buildup. Use a soft cloth to wipe down all surfaces. Cover the machine with a breathable cloth or a hardcover case to protect it from dust and moisture. Store it in a dry‚ cool place‚ such as a cupboard or under a bed‚ elevated on a pallet to avoid humidity. Avoid storing in attics or basements prone to extreme temperatures or pests.
10.2 Maintaining the Machine in Storage
While in storage‚ periodically check the machine to ensure it remains clean and dry. Apply a thin layer of machine oil to metal parts to prevent rust. Store the needle in a separate‚ labeled container to avoid dulling. If using a case‚ ensure it is well-ventilated to prevent moisture buildup. Every six months‚ gently turn the handwheel to keep internal mechanisms lubricated. Avoid extreme temperatures and humidity to preserve the machine’s condition for future use.
Resources for Vintage Singer Sewing Machines
Find free PDF manuals‚ setup guides‚ and troubleshooting tips online. Join sewing communities for support and access to rare parts for models like 15-90 and 201k.
11.1 Finding Free PDF Manuals Online
Free PDF manuals for vintage Singer sewing machines are widely available online. Singer’s official website offers downloadable manuals for various models‚ including 15-90‚ 201k‚ and 66k. Additionally‚ third-party sites like ManualsLib and SewingPartsOnline provide free access to these resources; Many manuals are available in multiple languages‚ ensuring accessibility for global users. Simply search for your specific model number‚ such as “Singer 15-90 manual PDF‚” to find and download the guide. Always verify the source for authenticity to ensure accurate instructions.
- Singer Official Website
- ManualsLib
- SewingPartsOnline
11.2 Online Communities and Forums for Support
Online communities and forums are invaluable for Singer sewing machine enthusiasts. Singer’s official website hosts forums offering troubleshooting tips‚ maintenance advice‚ and user experiences. Third-party platforms like QuiltingHub and Sewing Parts Online feature dedicated sections for vintage Singer models. Facebook groups and Reddit communities also provide spaces to ask questions‚ share projects‚ and connect with fellow sewists. These resources foster a supportive environment for mastering and preserving vintage Singer machines.
- Singer Official Forums
- QuiltingHub
- Sewing Parts Online
Old Singer sewing machines are timeless treasures. With proper care and manual guidance‚ they continue to inspire creativity. Embrace their heritage and enjoy sewing with these classic machines.
12.1 Final Tips for Enjoying Your Vintage Singer
Regularly maintain your machine with Singer oil and keep it clean. Explore creative projects like quilting or embroidery. Join online communities for inspiration and support. Always refer to your manual for guidance. Store your machine properly when not in use to preserve its condition. Embrace the charm of vintage sewing and enjoy the satisfaction of creating something timeless with your Singer.
12.2 Encouragement to Explore Creative Sewing Projects
Embrace the versatility of your vintage Singer by exploring creative sewing projects‚ such as quilting‚ embroidery‚ or upcycling fabric. Use the machine’s stitch options and attachments to craft unique items like bags‚ dresses‚ or home decor. Experiment with different fabrics and techniques to unlock your creativity. Online communities and forums are great sources of inspiration. Remember‚ every stitch tells a story—enjoy the journey of creating something truly personal and meaningful with your Singer sewing machine.